An OBS alternative for Mac when you only need to record the screen
Quick answer: OBS Studio is free, open source and runs on macOS 13 or newer, built for streaming and scenes. To record the Mac screen with its sound and get a styled MP4, Screen2Shot is simpler: ⌥⇧⌘9 starts and stops, and Studio sets the cursor, zoom and background. For live streaming or many sources, OBS is still the better choice.
Why people look for an OBS alternative on a Mac
- A scene before the first recording. OBS Studio records what its scenes and sources show, so a first recording starts with adding a macOS Screen Capture source in the Sources dock.
- Built for streaming. Scenes, transitions, Studio Mode and an audio mixer with filters serve live shows; a two-minute tutorial uses little of it.
- Raw output. OBS records the screen as it is. A recording for a product page or a help article often needs a calmer cursor, zoom on clicks and a background, which OBS’s site does not list.
OBS Studio vs Screen2Shot
| Feature | OBS Studio | Screen2Shot |
|---|---|---|
| Price | free, open source | free, with a thin Screen2Shot strip at the bottom of free exports; PRO 5.99 USD a month or 79.99 USD once from the website (Direct download) |
| Start a recording | Start Recording in the Controls dock, or a hotkey you set | ⌥⇧⌘9, or Record Area… and drag |
| Live streaming | ✅ | ❌ |
| Scenes, transitions, Studio Mode | ✅ | ❌ |
| Webcam, capture cards, browser sources | ✅ | ❌ |
| The Mac’s sound | ✅ macOS 13 or later | ✅ macOS 15 or later, System Audio switch |
| Microphone | ✅ | ✅ Microphone switch |
| Audio mixer with filters | ✅ noise gate, noise suppression, gain | ❌ two switches |
| Auto zoom on clicks | ❌ (none listed on its site) | ✅ PRO |
| Smooth cursor and cursor size after recording | ❌ (none listed on its site) | ✅ PRO |
| Backgrounds, padding, rounded corners, shadow | ❌ (none listed on its site) | ✅ PRO |
| Area screenshots with markup | ❌ (none listed on its site) | ✅ free, ⇧⌘9 |
| Plugins and scripts | ✅ VST, native plugins, Lua and Python | ❌ |
| Export | set in Settings → Output | MP4 up to 1080p free, up to 4K with PRO |
| macOS | 13.0 or newer, Apple silicon build available | macOS 15 Sequoia for recording, macOS 14 Sonoma for screenshots; Apple silicon only |
| Windows and Linux | ✅ | ❌ |
Checked on 2026-10-11. Sources below.
Recording needs macOS 15 Sequoia or later. Direct download: Sold through Stripe (Onelink is the merchant of record). Taxes are included where they apply.
What you keep and what you give up
What you keep. The Mac’s sound and your microphone in the same recording: in Screen2Shot they are the System Audio and Microphone switches under Recording ▸. Recording has no time limit.
What you give up. Live streaming, scenes, transitions, webcams, capture cards, an audio mixer with filters, plugins, and Windows and Linux. Screen2Shot’s Studio has no timeline, so you cannot trim, cut or change speed.
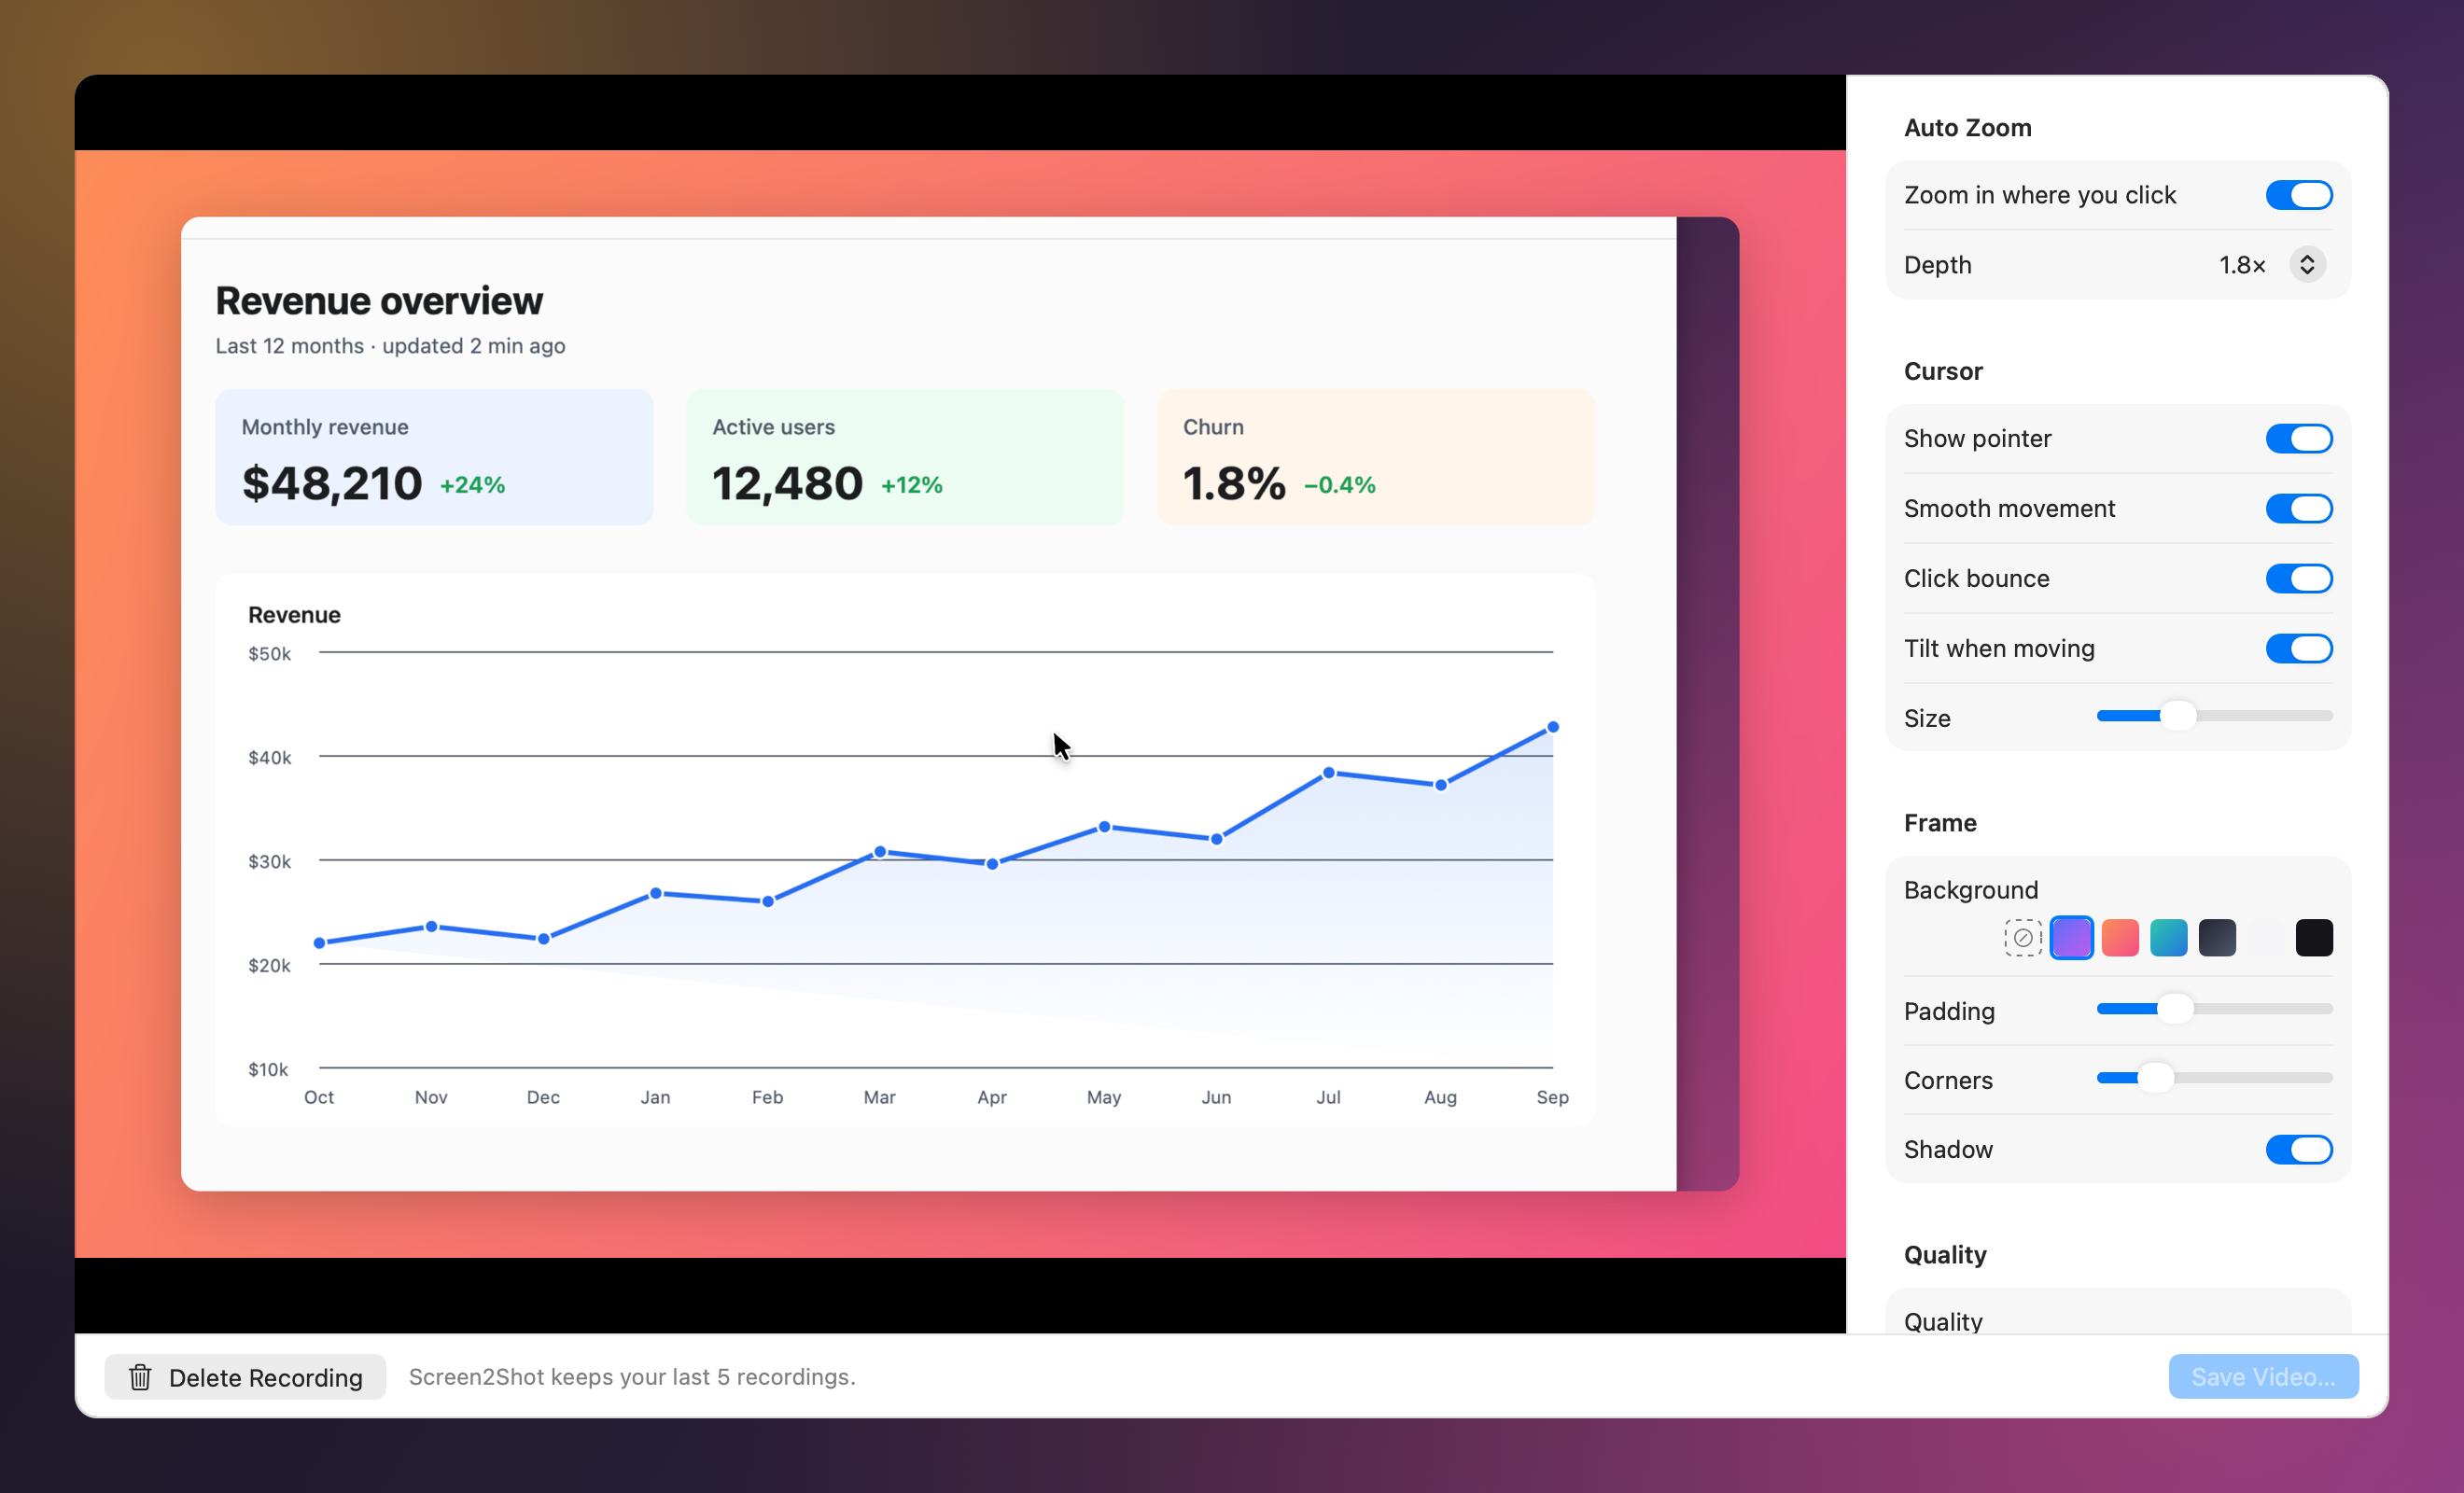
What you gain. One shortcut instead of a scene. Studio opens after you stop, and PRO adds auto zoom on clicks, a smooth cursor with click bounce and size, and a frame with a background, padding, rounded corners and a shadow. Screenshots live in the same menu-bar app: ⇧⌘9, drag, mark up, ⌘C.
When OBS Studio is still the right choice
- You stream live, or switch between scenes while you record.
- You record a webcam, a capture card or several sources in one video.
- You need audio filters such as noise suppression, or plugins.
- You record on Windows or Linux as well, or on a Mac with macOS 13 or 14.
- You want a free recording without a Screen2Shot strip at the bottom.
How to switch
- In Screen2Shot’s menu, open Recording ▸ and turn on System Audio and Microphone if you want sound.
- Press ⌥⇧⌘9 to record the display under the pointer, or choose Record Area… and drag a rectangle. Recording starts at once, with no countdown.
- Press ⌥⇧⌘9 again to stop. Studio opens with the recording playing.
- Set Auto Zoom, Cursor, Frame and Quality, then choose Save Video… to export an MP4 to your Movies folder.
Prices are on the pricing page. For the built-in way without any app, see how to screen record on a Mac.